


Welcome to a new series here on The Higher Tempo as a collection of our best Football Manager writers take a look at guiding you through ‘5 Things’ to do when undertaking a particular task on Football Manager 2018. In this guide, we’re looking at setting up a tactic, which is something we all do in the hope that those abstract constructs of unfathomable binary code do as they’re told… or at least hold something resembling a half-decent defensive line.
1. Set Your Base Formation
When you start to put together a tactic, head over to the Tactics screen (or click Control+T). You’ll find a list of your squad and a nice green pitch for you to move players around. There’s plenty of pre-sets there for you to choose from. The question here is, are you going to play based on your wants and needs or mould yourself to fit what players you have at your disposal?
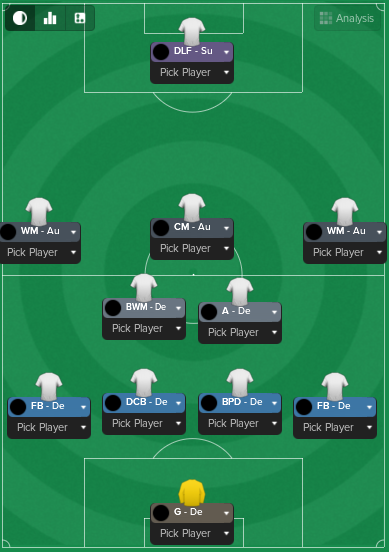
In my example, I’m using AFC Fylde and I’ve set them up pretty much how they do in real life in a 4-1-2-3.
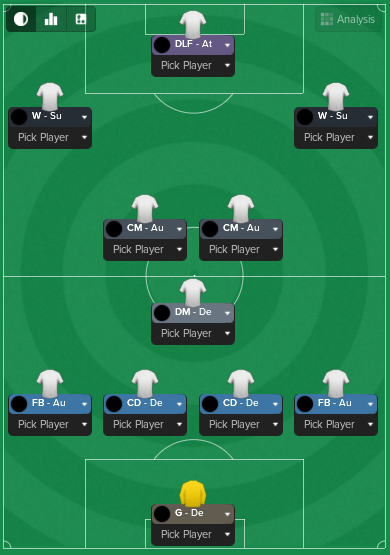 2. Player Roles
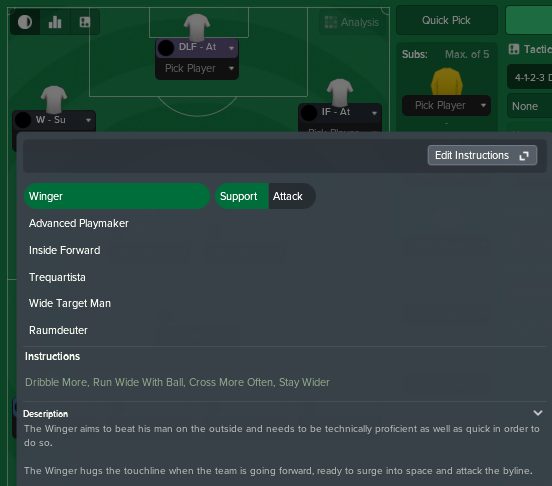
So you’ve got your base formation, next step is to assign the Player Roles. This year on Football Manager 2018 there are new added roles for you to play with along with the old classic favourites. In defensive midfield, we now have a Segundo Volante and in central midfield, you can pick from Carrilero and Mezzala. If you can’t see a certain role, your player isn’t in the correct position for it. For example, a Segundo Volante is only available as either side of the two central defensive midfield positions.
Helpfully there’s also descriptions attached to each role so you can understand what you’re selecting before throwing your footballers out onto the pitch with a rabbit-caught-in-the-headlights expression. In my example I’m going to portray myself as everyone’s favourite Frenchman in North London from a couple of years ago, favouring one genuine winger and one inside forward to cut in from the touchline.
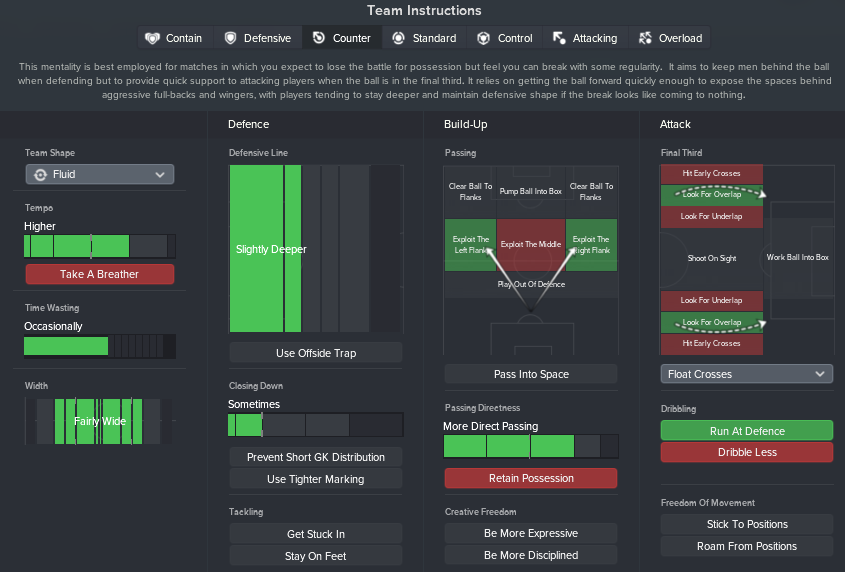
 3. Team Instructions
Supporting your chosen formation is the Team Instructions. This enables your team to play in certain style and gives your team the impetus to achieve your ambitions. In my example with AFC Fylde, I’ll take you from left to right.
I want the tempo high and the width fairly wide, this will help with later instructions. The defence are told to sit slightly deeper, this is because our central defenders aren’t blessed with great pace. I’d rather they dropped off and prepared to shore up. With decent wingers/inside forwards, I think we can exploit the flanks and when we win the ball back, I want it swept out there quickly so we’ll go direct in terms of passing. Our full-backs are set to support so we’ll look to overlap and with a target man in Danny Rowe, floating crosses for him to win headers seems to make sense.
The team instructions do complement your chosen formation so bear that in mind, there’s no point in a very narrow formation looking to exploit the flanks because you’ve got nobody there to perform that task.
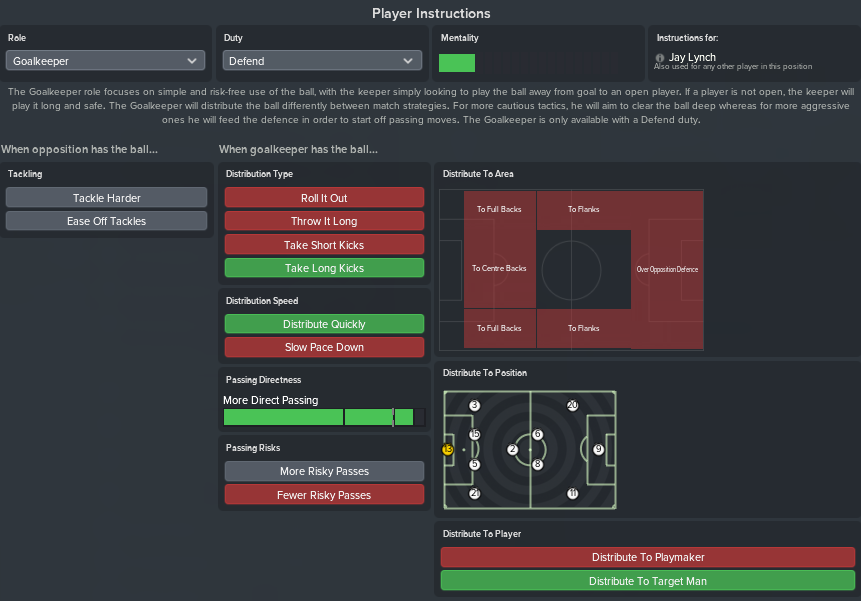
 4. Individual Player Instructions
Not all players will be au fait with every role they are being asked to perform, so utilising player instructions can give you an edge and embed your tactical approach. To add a player instruction, click the arrow for Player Role and you’ll see an ‘Edit Instructions’ box. In there, you can toggle to your heart’s content.
In my example with AFC Fylde, I’m looking at the goalkeeper position. Whether I choose Jay Lynch or Rhys Taylor between the sticks, I want them to hit the target man up front with long goal kicks and do it quickly to unsettle the defence.
5. Flex!
If you like your in-game management, my advice is to be flexible. Save your current tactic and work on another version for reacting to in-game scenarios.
Harking back to the Rivalità Tra Fratelli challenge I had a base formation entitled the ‘Skewer’ for control or attacking play and two other alternatives stored ready for use. The ‘Classic Portuguese’ was set up to counter when we were under the cosh against strong sides such as Juventus. The ‘Padlock’ contained elements of a Catenaccio for defending a lead with the emphasis on tightening up and seeing out games.
If you go two goals up, what formation do you switch to? If you’re two goals down and desperately needing a point, which system do you employ? This is an example of a system I’ve set up based around one which I can hardly ever get through when other teams use it against me.
 Hopefully, that has helped, enjoy setting up tactics and don’t be afraid to share them online. I’m on twitter @CharlieTangoFM or follow my exploits in the #LetouDecide save with Swansea City here on The Higher Tempo.


